
Connecting Your First API
A step-by-step guide to connecting your first API to a drio MCP tool using Open-Meteo, with clean request setup, widget mapping, troubleshooting, and deployment.
The fastest way to connect your first API in drio is to keep the first tool narrow, the data source reliable, and the output format simple. In practice, that means one user input, one or two clean HTTP requests, one clear response shape, and one widget choice that matches what the user needs to do next.
This tutorial walks through that exact path using Open-Meteo. It is a good first API because Open-Meteo's docs say the service is free for non-commercial use and does not require an API key, registration, or credit card. We will use its geocoding API to resolve a city name and its forecast API to return current conditions plus a 7-day view.
If you need the protocol background first, start with What Is MCP?. If you want the short speed-run version of this same build, see From Idea to AI App in 10 Minutes.
What we are building
By the end of this guide, you will have a weather tool that:
- accepts a city name
- resolves that city into latitude and longitude
- fetches forecast data from Open-Meteo
- renders the result as a richer in-chat response instead of raw JSON
That is enough to learn the full pattern you will reuse with other APIs later: input, request, mapping, preview, publish.
Before you start
Come in with four things:
- one clear tool idea
- one trustworthy API
- one or two real prompts you want the tool to answer
- a rough sense of the output format you want
For this tutorial, the tool idea is "get weather for a city." The prompts are simple:
- "What is the weather in Berlin?"
- "Show me this week's forecast for Amsterdam."
That is enough to keep the first build focused.
Step 1: Create the tool and define the input
Start by creating a tool with one required input:
city
Keep the tool name and description concrete. You want the model to understand when to use it and what kind of answer it returns.
Example:
- Name:
get_weather - Description: "Get current weather conditions and a 7-day forecast for a city"
This is also where you define the argument schema in practice, even though drio is handling the authoring visually. The tool is easier for the model to use when the input is explicit and the description is specific.
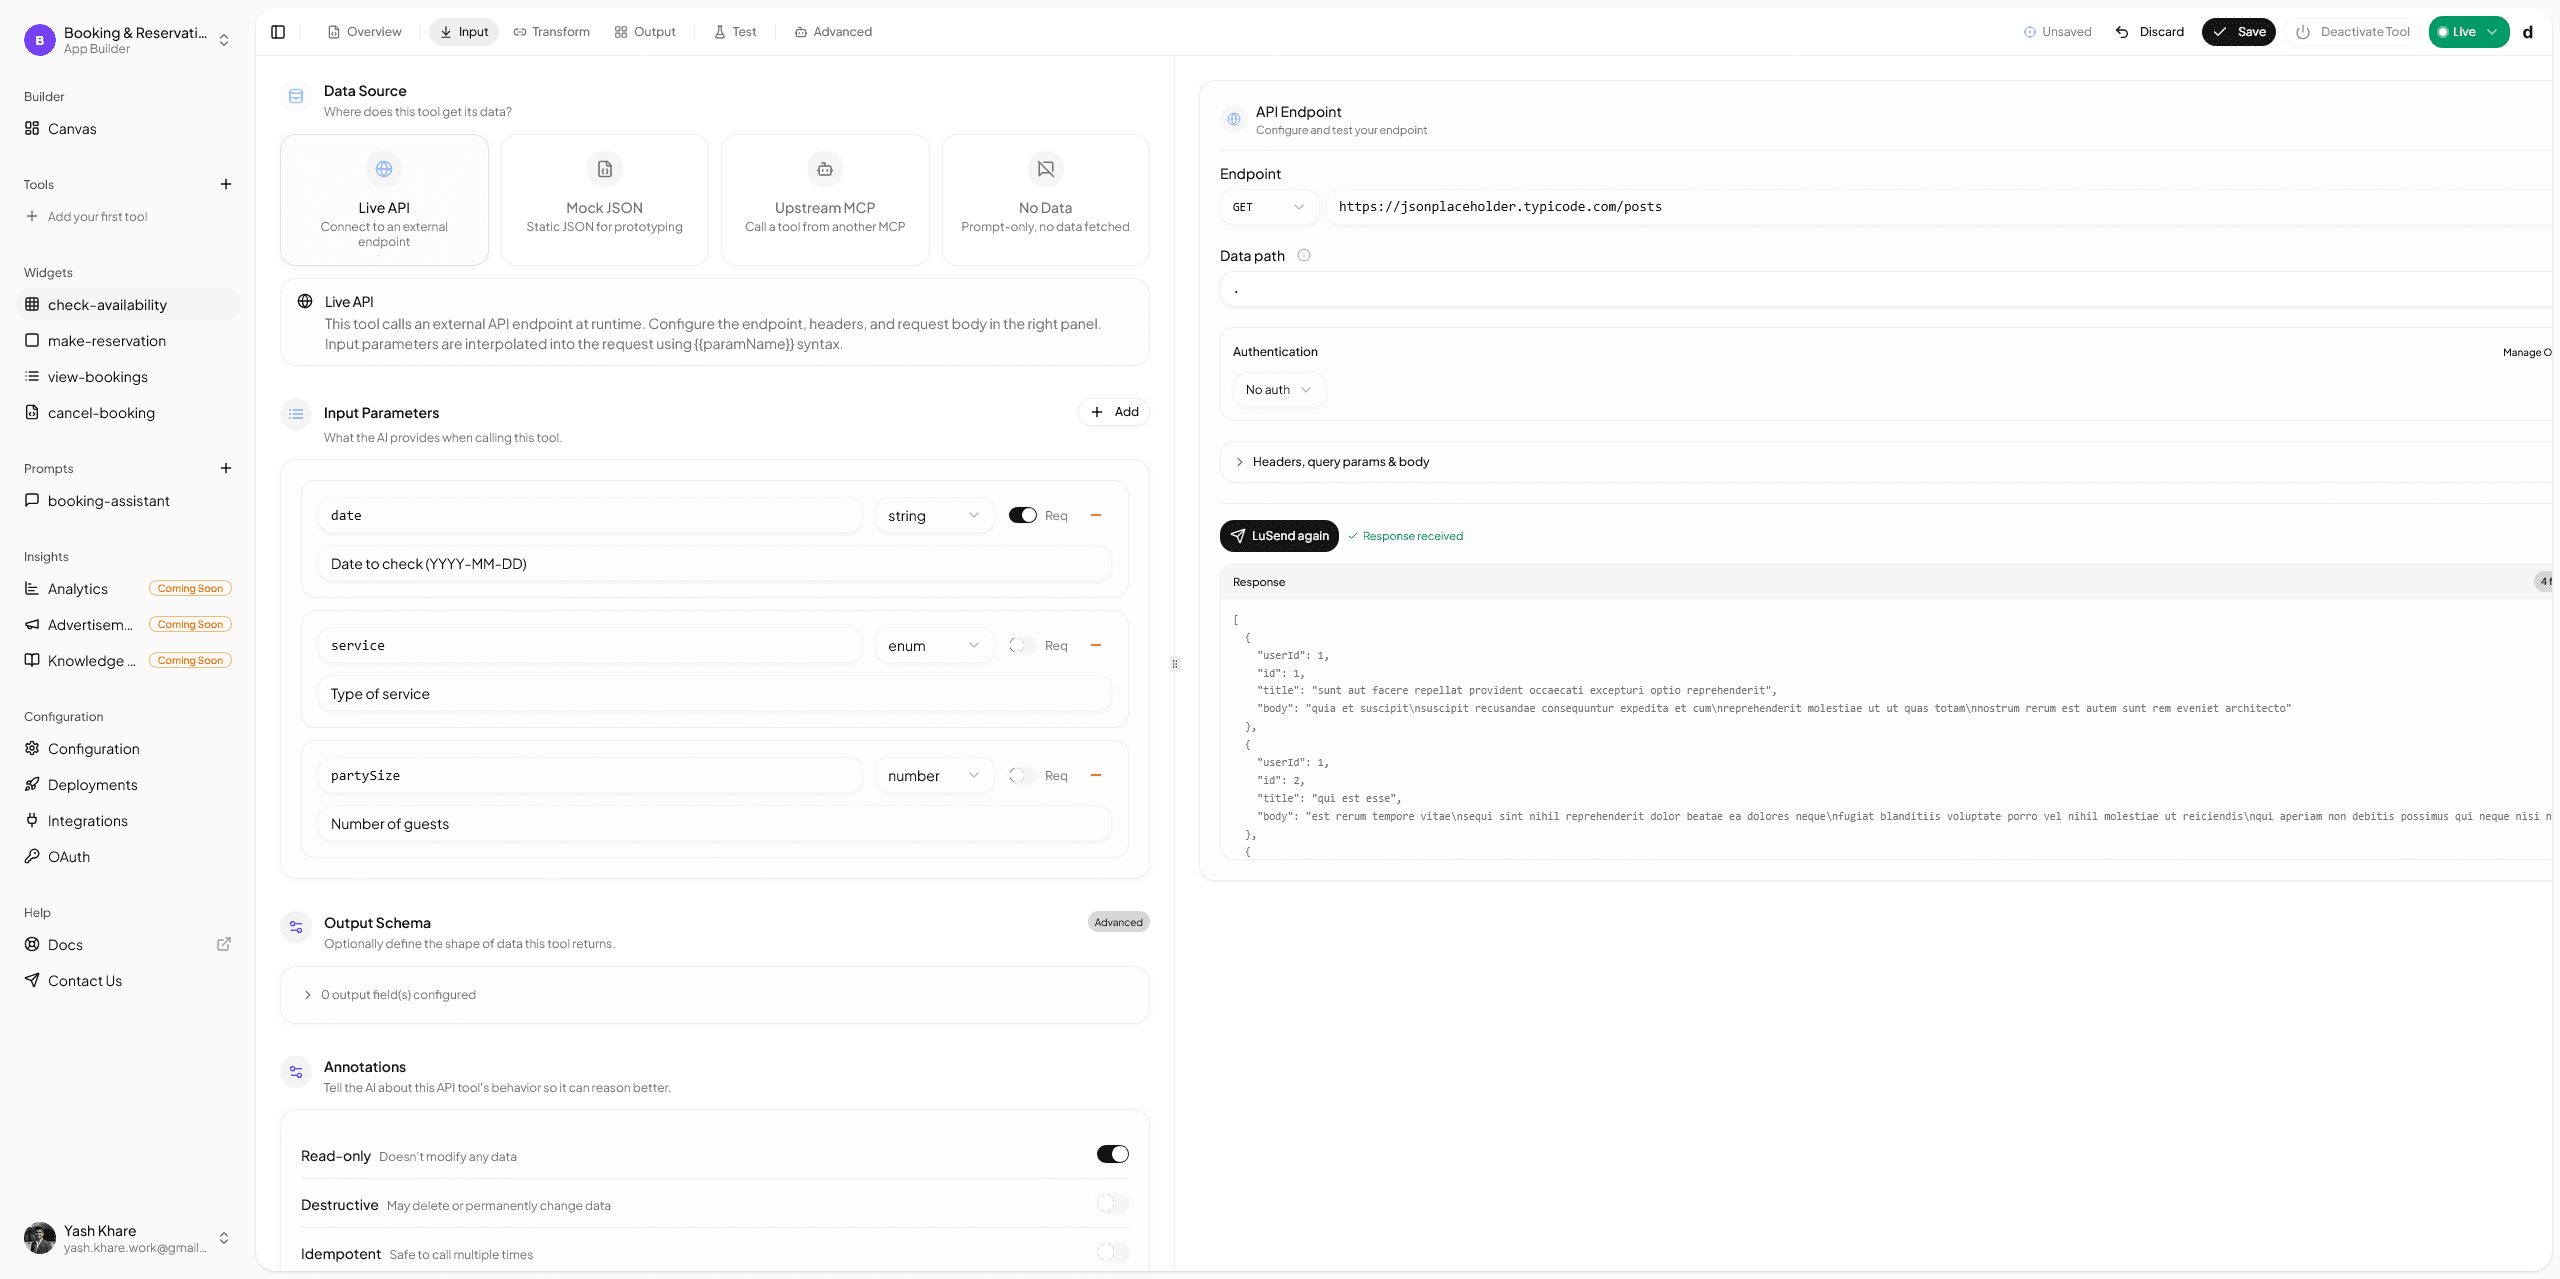
Step 2: Add a geocoding request
The weather API needs coordinates, not a plain city string. So the first request should resolve the city into latitude and longitude.
Open-Meteo's Geocoding API documents this endpoint:
https://geocoding-api.open-meteo.com/v1/searchFor the first request, configure:
- Method:
GET - Base URL:
https://geocoding-api.open-meteo.com/v1/search - Query params:
name={{city}}count=1language=enformat=json
The docs say the response returns matching locations in results, including:
results[0].nameresults[0].latituderesults[0].longituderesults[0].timezone
That gives you everything you need for the second request.
Step 3: Add the forecast request
Now add a second API request for the actual weather data.
Use Open-Meteo's forecast endpoint:
https://api.open-meteo.com/v1/forecastConfigure it so latitude and longitude come from the geocoding step, then request the fields you actually plan to render.
A clean starting setup is:
current=temperature_2m,relative_humidity_2m,weather_code,wind_speed_10m
daily=temperature_2m_max,temperature_2m_min,weather_code
timezone=auto
forecast_days=7
In drio, map the latitude and longitude from the first request into the second one rather than hardcoding them. This is the first important mental model for API chaining:
- request 1 finds the location
- request 2 uses that result as its input
That is a much more reusable pattern than stuffing everything into one large request and hoping the input shape works out later.
Step 4: Test the requests before you touch the UI
This is where many first builds go sideways.
Do not start mapping widgets until both requests return the data shape you expect.
For the geocoding step, confirm that:
- the response includes a
resultsarray - the first result is the city you expect
- latitude and longitude are populated
For the forecast step, confirm that:
- the
currentobject contains the current conditions you asked for - the
dailyobject contains the seven-day data you want to display - the field names match what you plan to map later
This step sounds obvious, but it is the easiest way to avoid confusing widget problems that are actually request-shape problems.
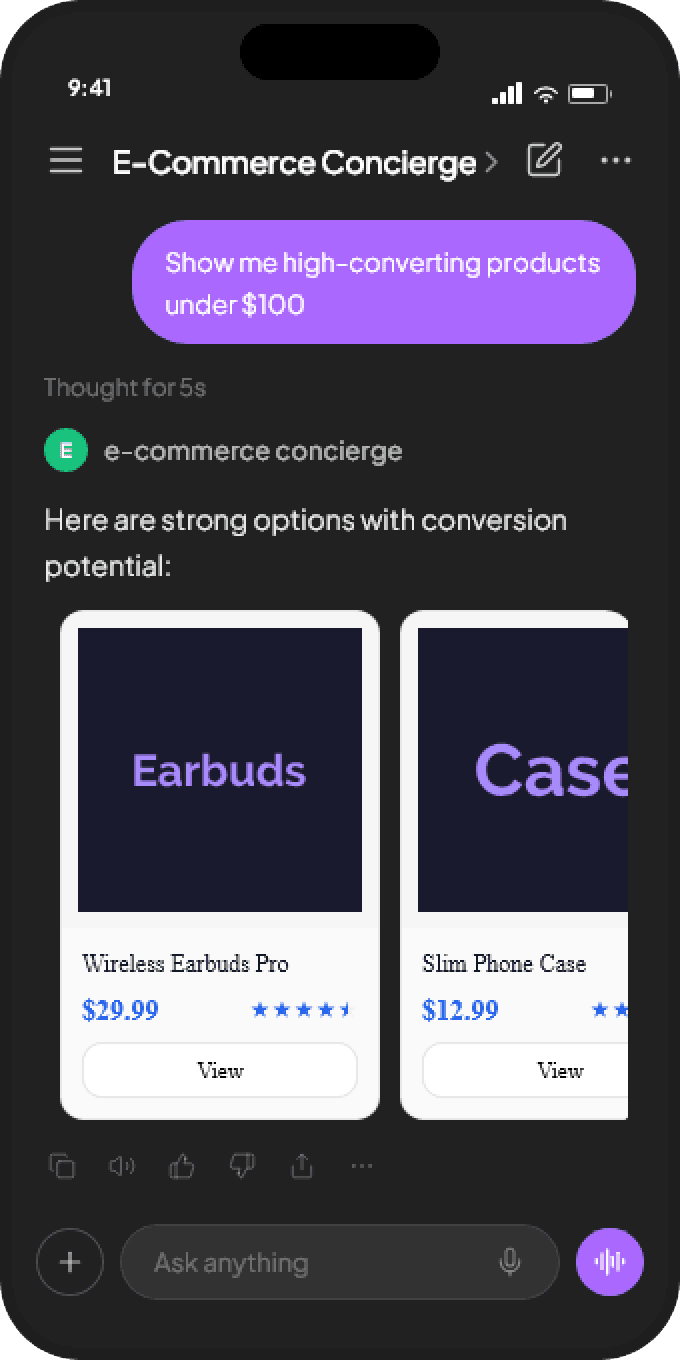
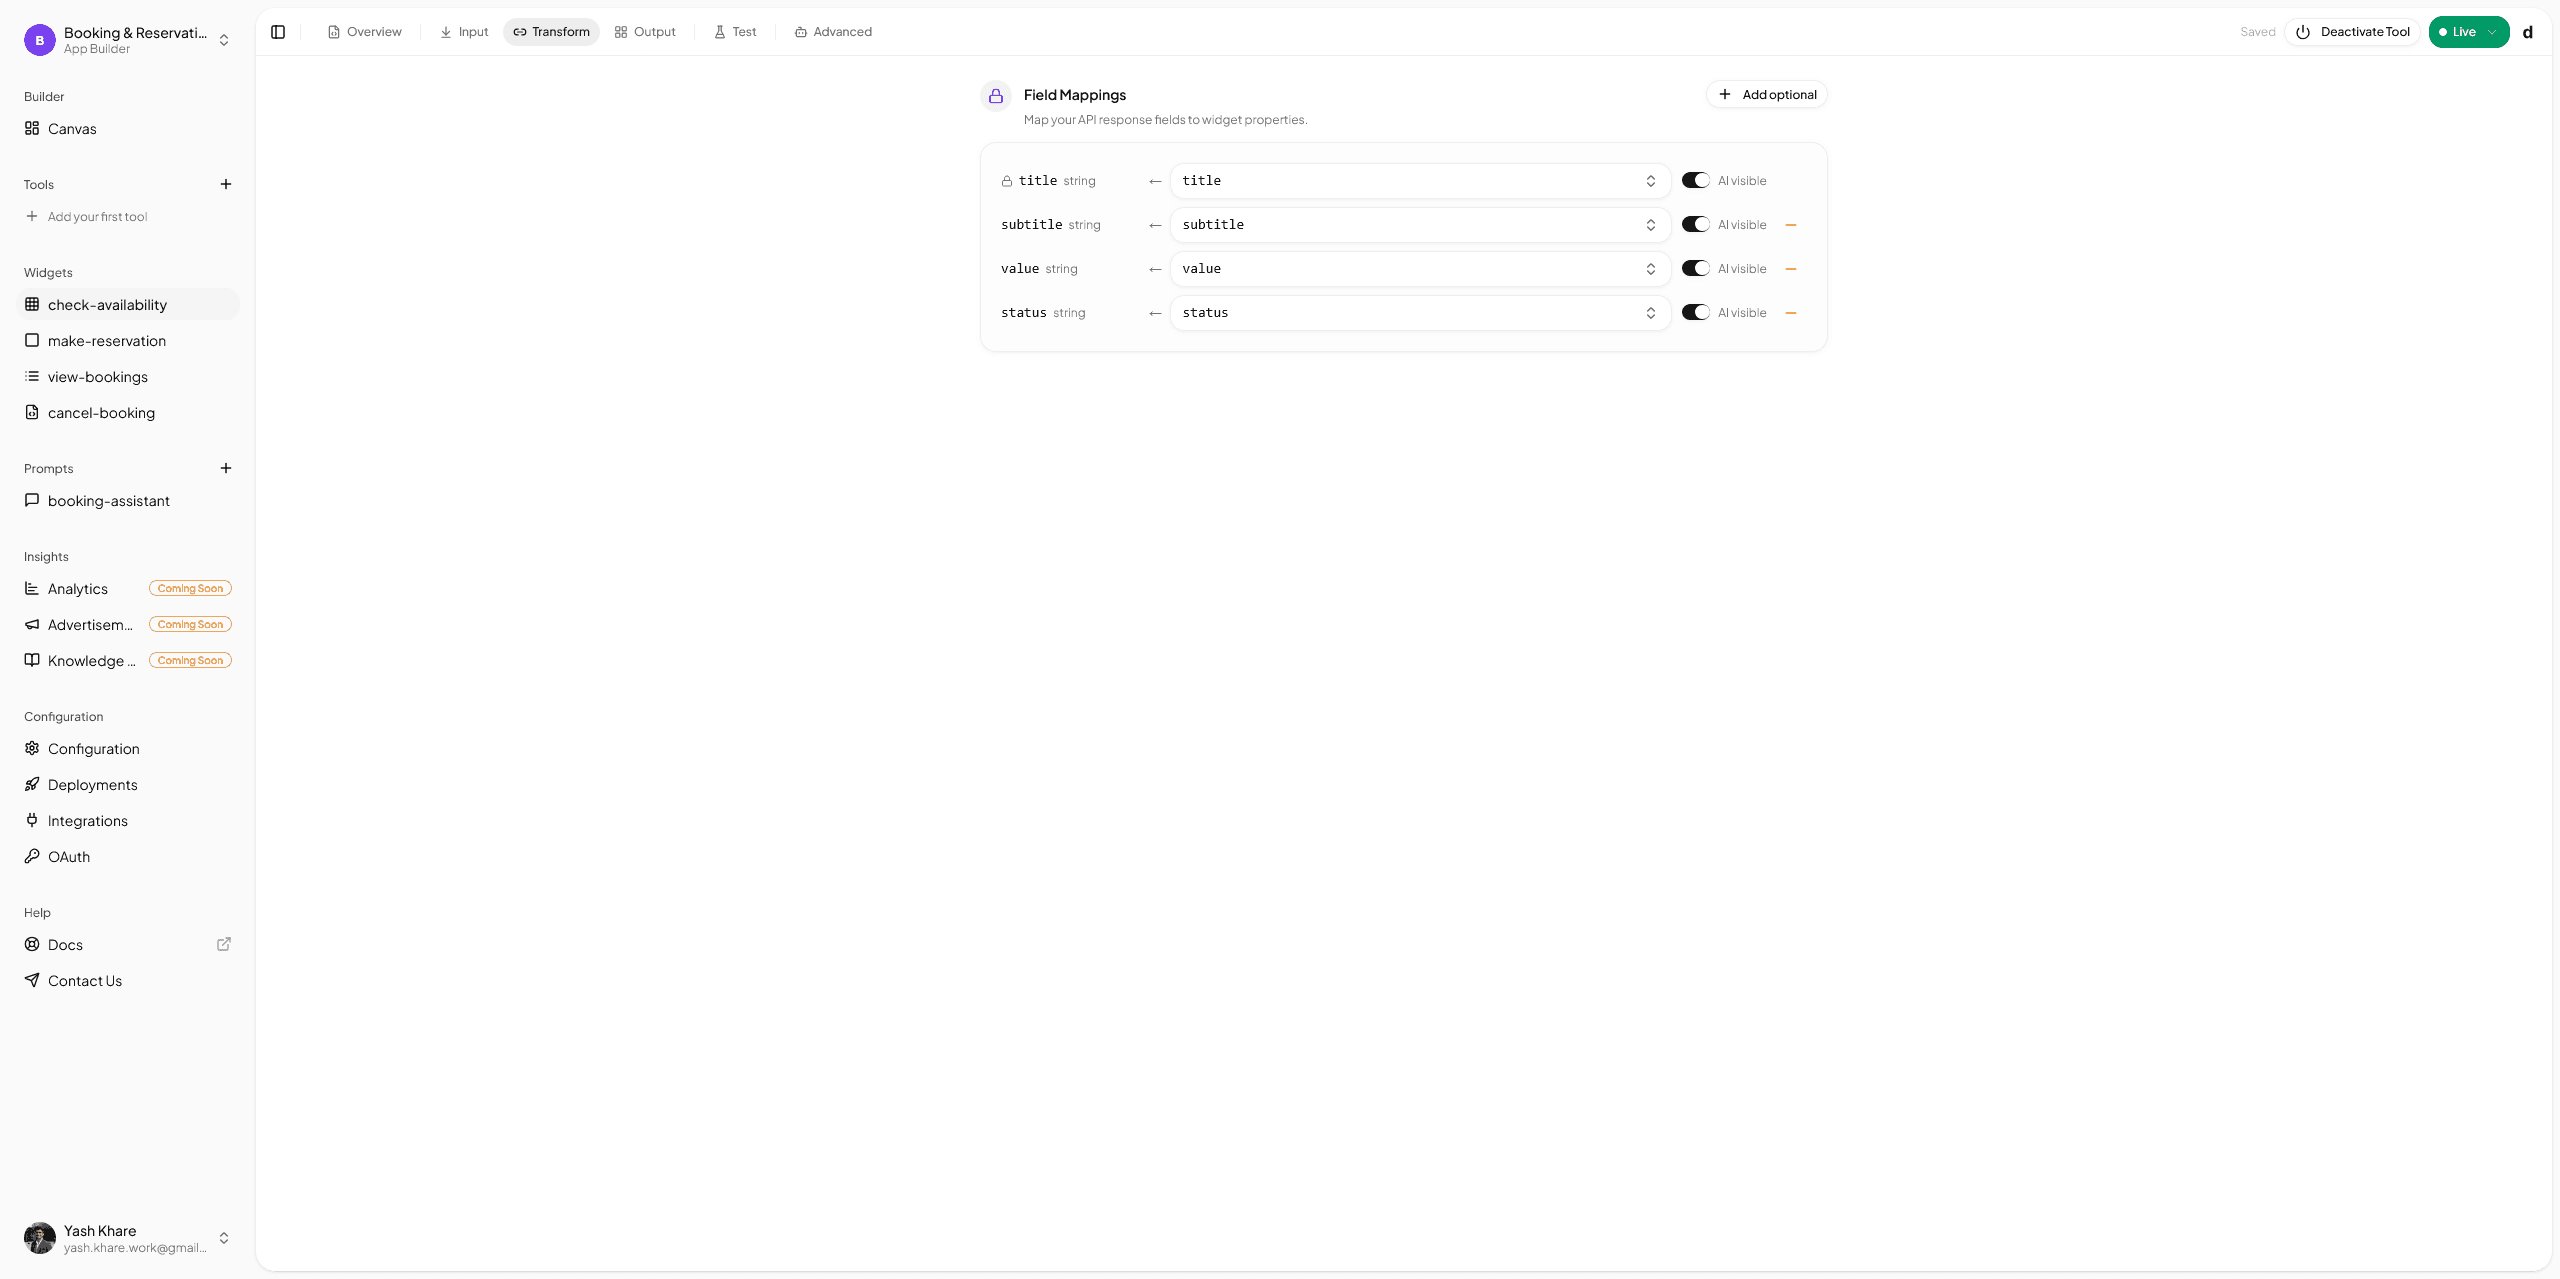
Step 5: Map the response into the right widgets
Once the API responses are stable, move to the response layer.
For this tutorial, use two widgets:
- one summary-style widget for current conditions
- one chart or table for the 7-day forecast
That combination keeps the answer easy to scan:
- the summary gives the user the answer immediately
- the second widget gives them the wider context
Here is the rule of thumb:
- use a card or stat-style view when the user needs the headline answer
- use a chart when the user needs the trend
- use a table when the user needs comparison row by row
If you want the deeper framework for that decision, read Building MCP Tools with Rich UIs and Choose The Right Response Format.
A config example that matches the workflow
The authoring experience is visual, but it helps to think in terms of simple request definitions.
Here is a compact version of the two-request setup:
const geocodeRequest = {
  method: "GET",
  url: "https://geocoding-api.open-meteo.com/v1/search",
  query: {
    name: "{{city}}",
    count: "1",
    language: "en",
    format: "json",
  },
};

const forecastRequest = {
  method: "GET",
  url: "https://api.open-meteo.com/v1/forecast",
  query: {
    latitude: "<mapped from geocode results[0].latitude>",
    longitude: "<mapped from geocode results[0].longitude>",
    current:
      "temperature_2m,relative_humidity_2m,weather_code,wind_speed_10m",
    daily: "temperature_2m_max,temperature_2m_min,weather_code",
    timezone: "auto",
    forecast_days: "7",
  },
};
You do not need to author raw objects like that in drio, but it is a helpful way to keep the tool readable in your head.
Step 6: Preview the tool with real prompts
Before you publish, run the actual prompts you care about.
For example:
- "What is the weather in Berlin?"
- "Show me the forecast for Paris."
- "What is the weather in a city that does not exist?"
You want to verify three things:
- the tool is selected consistently
- the output is easy to scan
- the empty or error path is still understandable
This is where the builder preview matters. It lets you catch mismatched field paths, awkward labels, and weak widget choices before the tool reaches a real client.
Step 7: Publish the endpoint and test in a client
Once the tool looks right in preview, publish it and copy the endpoint.
Per the current drio endpoint docs, the endpoint pattern looks like:
https://getdrio.com/api/mcp/your-app-slugThat is the URL you use in the client connection step.
If you are testing in ChatGPT, use How to Add MCP Tools to ChatGPT for the current setup path. OpenAI's setup surfaces have changed over time, so it is better to keep the detailed ChatGPT steps consolidated on one post and keep this article focused on the API workflow itself.
Troubleshooting the common first-build problems
The geocoding request returns no result
Check the city string first. Open-Meteo's geocoding docs note that the name parameter is required, and short or malformed strings can return empty results. Try a more explicit city name or add a country hint in the prompt.
The forecast request fails even though the first request worked
That usually means latitude and longitude were not mapped from the geocoding result correctly. Inspect the first response again and make sure you are using the first result object, not the root array.
The widget shows the wrong value
This is usually a field-path issue, not a widget issue. Go back to the response inspector and confirm the exact path before adjusting the UI.
The tool works in preview but not in the client
Confirm that you published the latest version and copied the correct endpoint URL. Then use the client-specific setup guide, especially for ChatGPT, because client connection surfaces can shift faster than the builder flow itself.
The response is technically correct but still feels weak
That is usually a response-format problem. If the user needs comparison or trend recognition, plain text will feel worse than a chart or table even when the data is accurate.
Where to go after the first API connection
Once this works, the next useful upgrades are:
- add a better empty state when no city match is found
- add more forecast fields such as precipitation or UV index
- turn the single-weather tool into a small weather app with follow-up actions
- swap Open-Meteo for one of your own business APIs
If you want to understand what an MCP server looks like when you build it by hand, the official Build an MCP server guide is the right reference. If you want the short version of this tutorial, go to From Idea to AI App in 10 Minutes.
Ready to connect something you already use?
The best next API is usually not a more complicated demo API. It is the cleanest real system your team already cares about. Start with one narrow job, one reliable endpoint, and one output format you can validate quickly.
Summary
Connecting your first API in drio gets much easier when you break the tool into clear stages: input, request, mapped output, preview, publish. In this tutorial, Open-Meteo is useful because it gives you a clean two-step pattern: geocode the city, then fetch the forecast.
That same pattern shows up again and again in real tools. Start narrow, validate each request before you design the UI, and use the simplest widget that helps the user act on the answer.
FAQ
What is the best first API to connect in drio?
A good first API is reliable, well documented, and simple enough that you can validate the response shape quickly. Open-Meteo is a strong example because it has public docs, requires no API key for the basic path, and returns structured data that maps well to widgets.
Should I use one API request or multiple requests?
Use the smallest number of requests that keeps the flow readable. In this example, two requests are better than one because geocoding and forecast retrieval are different jobs and easier to debug separately.
Do I need to understand MCP to connect an API in drio?
You do not need deep protocol knowledge to do the builder workflow. But it helps to understand that the API connection is feeding a tool the model can call through an MCP-compatible runtime.
Why does my API work in preview but not in ChatGPT?
That is usually a publishing or connection issue, not an API issue. Confirm the latest version is published, copy the correct endpoint URL, and then follow the current ChatGPT setup guide because OpenAI's settings surfaces can change.
When should I use a chart instead of a table?
Use a chart when the user mainly needs the trend or comparison over time. Use a table when they need to inspect specific rows or compare several records in detail.
Get the Builder Brief
Weekly tactical notes on shipping ChatGPT apps, MCP integrations, and product-led distribution.